Creating a Debian Cloud-Init Template in Xen Orchestra
Xen Orchestra (the manager for my XCP-NG based hypervisors) supports cloud-init for creation-time configuration of virtual machines. This guide walks through creating a cloud-init ready VM Template for Xen Orchestra using Debian 12.
Downloading Debian
I'll be using Debian 12 in this post (the stable version at the time of writing) but these steps should be roughly the same for future versions of Debian.
Cloud Images
Debian offers several flavors of "cloud" disk images for use with various cloud vendors along with a "generic" image. These images can be direclty used as a VM disk on their respective platforms, offering a base install of Debian that can be customizable at runtime via cloud-init or a vendor specific configuration mechanism. The images are available on their site.
The two flavors of Debian cloud images useful for a homelab are "generic" and "genericcloud". "Genericcloud" lacks hardware driver support resulting in a smaller overall install size. Only use the "genericcloud" image if you know you will not need any generic hardware support (such as pci-e passthrough). In my experience, it's been best to use the "generic" image with Proxmox.
Prepping the Image
Download the latest generic or genericcloud .qcow2 image from the Debian site to your local machine.
Qcow2 images aren't compatible with Xen Orchestra or XCP-NG, so it needs to be converted to the VMDK format instead. On Linux, qemu-img is capable of converting the disk for us, so install it from your package manager to complete the next step.
This .vmdk image can be imported direclty into Xen Orchestra for use.
Creating Templates
Xen Orchestra only exposes cloud-init configuration through a complete cloud-init ready template. Since Debian only provides a disk and not a full VM (.ova/.ovf) template, the only way to get a working template is to create a VM and convert it to a template.
The image provided from Debian has no root user password and no additional users configured, so any additional software modifications to the final template must be done in an intermediate stage which will be covered in a later step.
Creating the Base Cloud-init Template
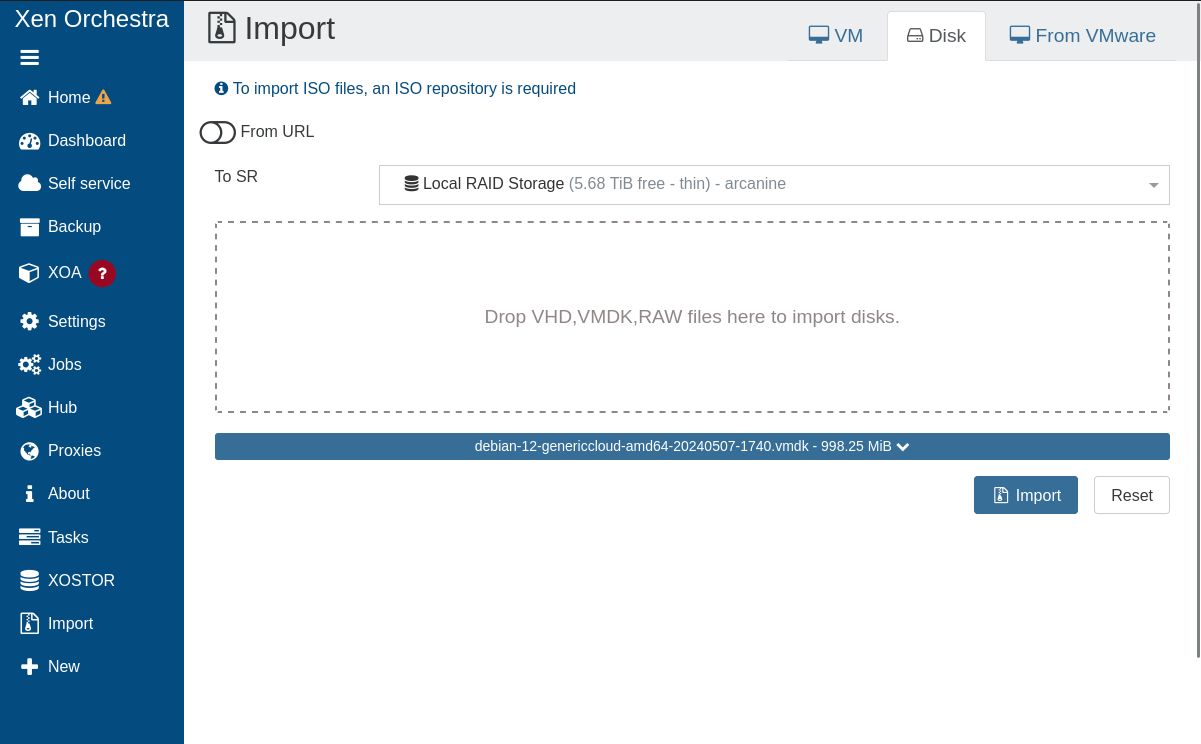
In Xen Orchestra, import the .vmdk from the previous step as a disk. On the left-side menu, open the "Import" tab, and choose the "Disk" tab on the top right. Choose a Storage Repository (SR) to import to, and import the disk.
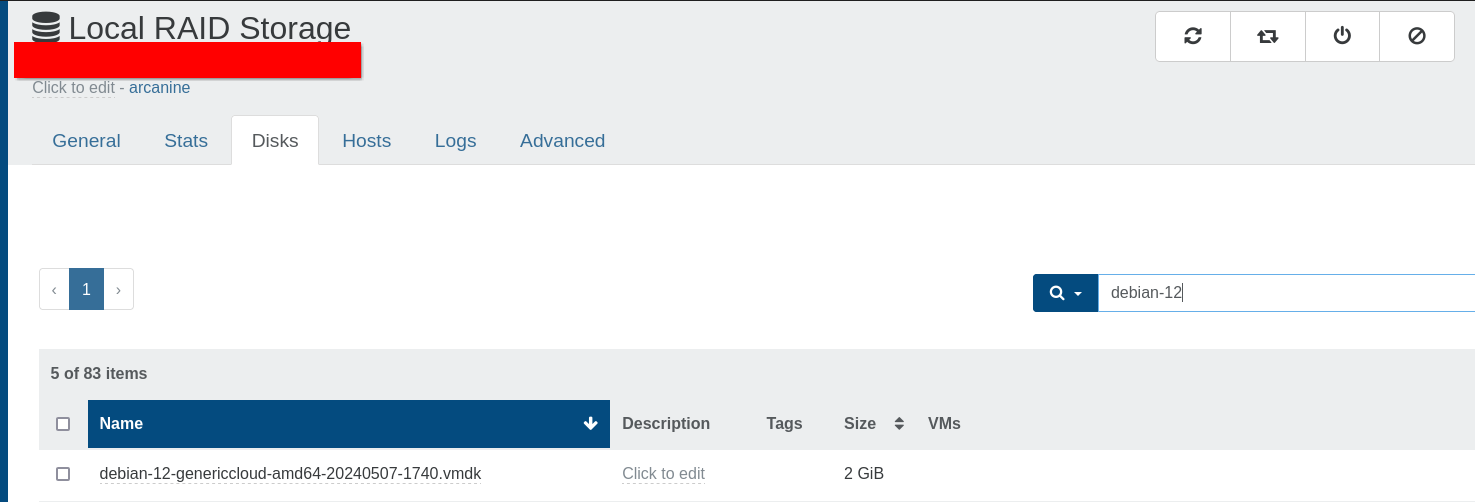
After import, the .vmdk will appear in the available virtual disk inventory for the selected Storage Repository.
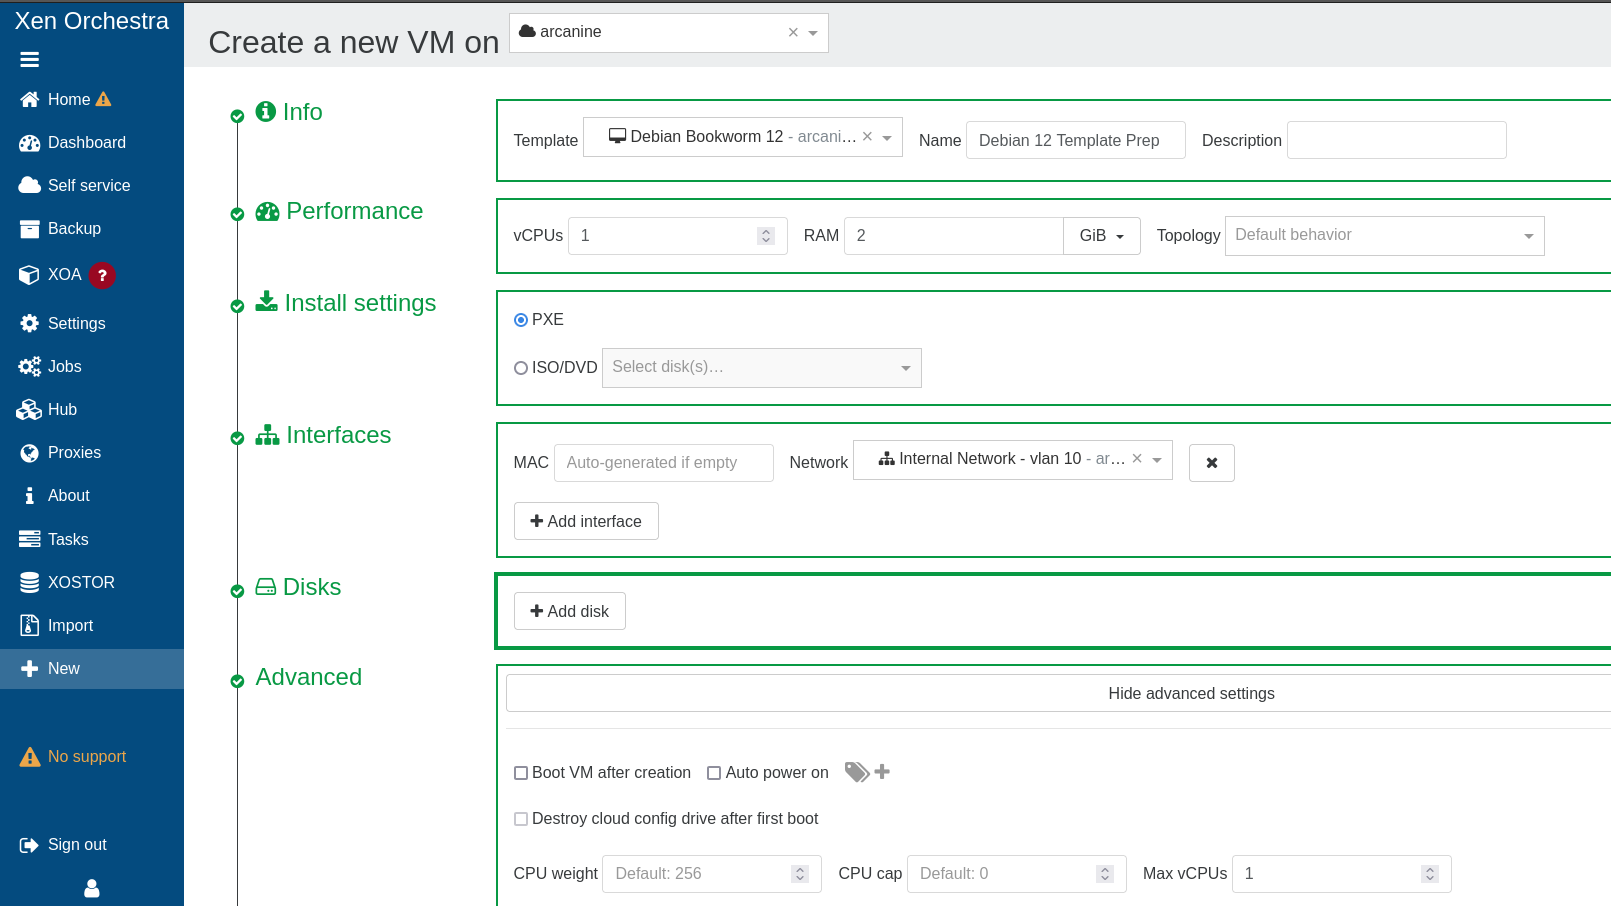
Next, create a new VM, with the following properties (do not omit any):
- use
PXEboot - Delete any existing disks
- Advanced > Uncheck
Boot VM after creation
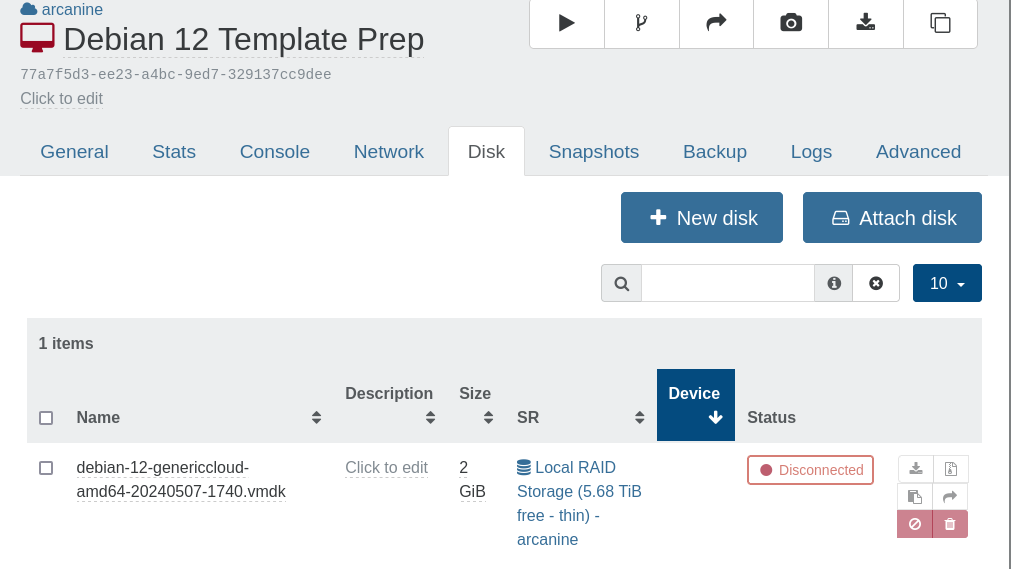
Now, under Disks on the newly created VM, attach the .vmdk imported previously. It's also smart to rename the disk at this stage, but that's not required.
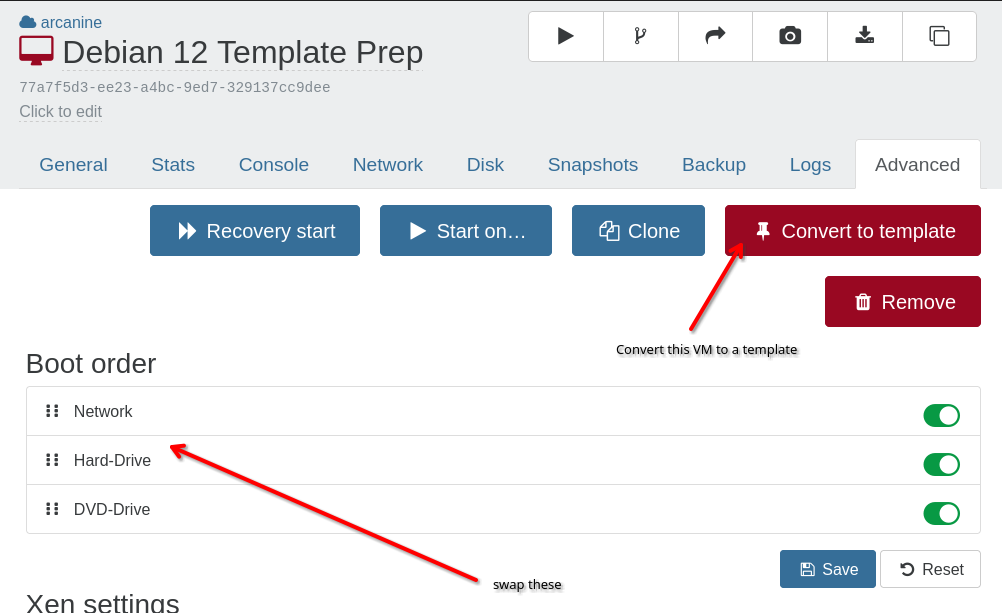
Finally, under Advanced set the boot order to Hard-Drive first (over PXE), and hit "Convert to Template".
It's a good idea to "Clone" this VM at this point as creating a template is a one-way operation. It's easier to roll back and fix a missed step with this intermediate clone, but it's not required.
This template can now be launched with a cloud-init template to specify actions to be taken on first boot. The VM's default disk size of 2GB can also be changed while the VM is off, and the filesystem will be automatically resized on the next boot to match the new size of the disk.
Installing xe-guest-utilities
I'm currently deploying xe-guest-utilities to all my VMs as it's considered stable. There is a new rust-based replacement under active development on gitlab and just underwent its 0.4 release. I'll likely switch after a 1.0 release to give some more time for bugs to get ironed out.
xe-guest-utilities is available on github.
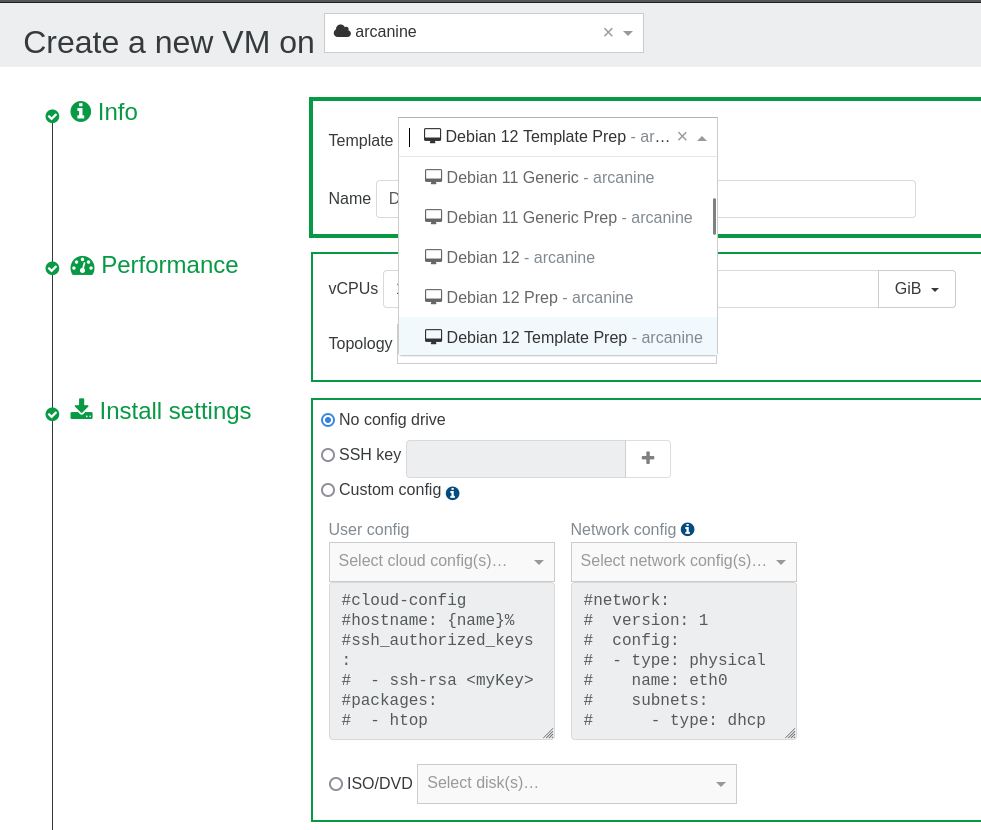
To create a template with xe-guest-utilities preinstlaled, create a new VM using the template created in the last step. Make sure to supply a cloud-init configuration here, see my default template for how to configure a cloud-init VM for SSH access.
Since there are no guest tools by default, Xen Orchestra will not report the IP address of this VM in the console. If a password was set for one of the users configured by cloud-init, the ip address could be obtained by logging in via the VM console. I typically just nmap my DHCP range and login with SSH.
Once logged in, download and install the guest tools .deb from github. and run cloud-init clean to prime cloud-init to run again on the next boot.
Convert the xe-guest-utilities VM into a template
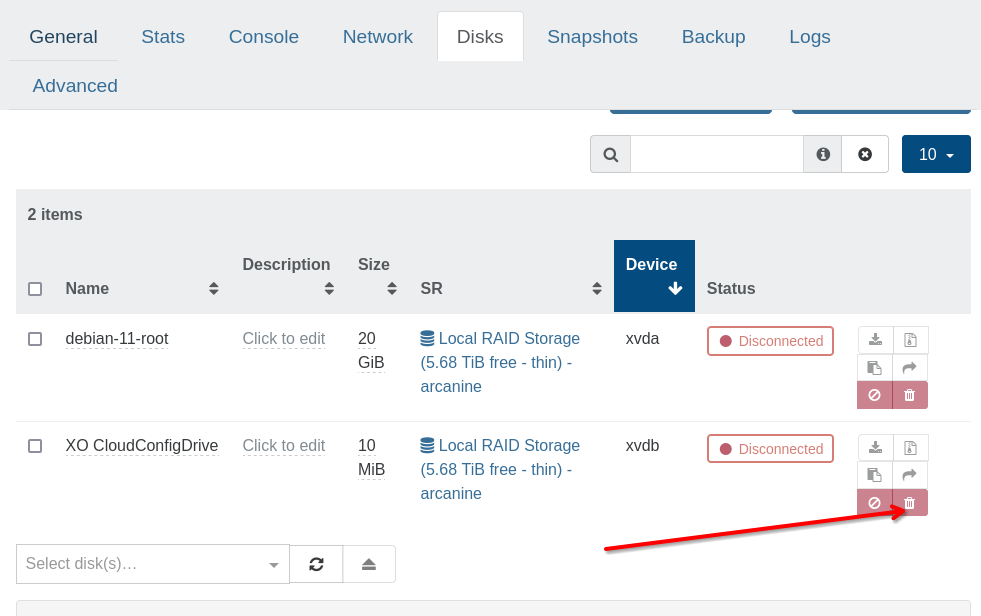
After the VM shuts down, remove the extra "cloud-init" disk that was added to the VM on creation, and convert it to a template. This is the final "production" template.
My "Default" Cloud-Init Template
On all my VMs, I create a "break glass" local administrator user with a specialized keypair used only for this purpose, as well as a local ansible runner user with a separate keypair that I can use with any of my ansible playbooks. This lets me go straight from VM deployment to running an ansible playbook to finalize the system configuration without any manual intervention.
It also updates all apt repositories and packages on first boot, which saves me some time later on (and makes sure I'm starting with the latest fixes).
I use DHCP for all of my VMs and create static reservations for some, so I don't bother with anything other than DHCP network configuration. A network config is required for cloud-init.
Debian 12 network interfaces inside Xen virtualization are now named
enXywhereyis an integer andXis a static capitalX. In Debian 11, interfaces were namedethy.More info:
https://xcp-ng.org/blog/2023/06/15/upgrading-from-debian-11-to-debian-12/
https://www.debian.org/releases/stable/amd64/release-notes/ch-information.en.html#xen-network
User Config (user-data):
#cloud-config
hostname:
groups:
- local_admins:
users:
- name: <admin-username>
gecos: "Admin"
groups:
sudo:
ssh_authorized_keys:
- <admin-ssh-public-key>
lock_passwd: false
shell: /bin/bash
- name: svc-ansible-local
gecos: "Local Ansible Service Account"
primary_group: local_admins
groups:
sudo:
ssh_authorized_keys:
- <ansible-ssh-public-key>
lock_passwd: true
shell: /bin/bash
packages:
- htop
- curl
- jq
- vim
- net-tools
- git
- mosh
- gnupg
- make
- tree
package_update: true
package_upgrade: true
Network Config:
network:
  version: 1
  config:
  - type: physical
    name: enX0
    subnets:
      - type: dhcp